
Cache Plugins play a vital role in optimizing the site loading time along with other factors.
For this Purpose, WP Super Cache plugin and W3 Total Cache Plugin are widely used by most bloggers and webmasters, because this will not only help to improve website performance but will also help to balance a huge amount of traffic and, alternatively, will increase search engine rankings.
Although there are other Cache plugins used by bloggers but we highly recommend one of the above because they are free and work equally like other WordPress cache plugins.

Installation of WP Super Cache Plugin:
The step-by-step guide will explain how to install and set up the WP Super Cache plugin.
1)-Search for the plugin in the wp plugin directory > download and install the WordPress Super Cache plugin. (You can also download the Cache Plugin and upload it to your dashboard)
2)-After installation, go to Settings > WP Super Cache > under Easy Tab turn cache on and hit the update status button.
After turning on the cache hit the test cache button and see if it is working. The wp super cache will fetch the website twice and time for both will show, see if the time of both matched then the WordPress cache plugin will work fine.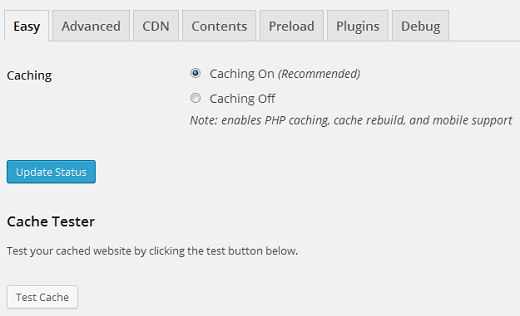
3)-Under Advanced Tab there is number of checkbox and radio button, first check the box that says Cache hits to this website for quick access, under this you will see three caching options, by default wp Super cache plugin, used PHP to serve cache file, although it is safe but not recommended for the shared hosting websites, so check use mod-rewrite to serve cache files.
Because this will also work in the same way as well and it will minimize your server resources.
Next, under the Miscellaneous option, check the first option that says Compress Pages, which serves visitors more quickly to visitors.
Scroll down and hit the update status button.
 WP Super Cache will now show you a notification that mod_rewrite rules must be updated, so update them and leave the other options as it is.
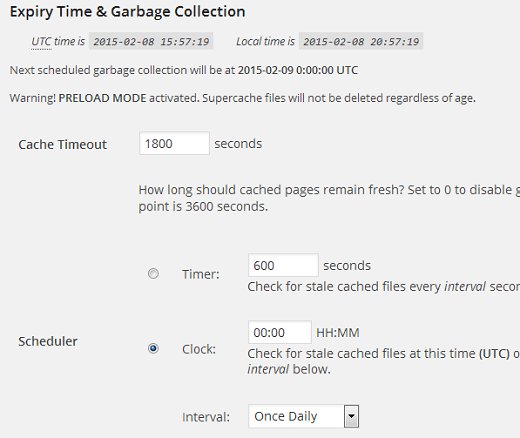
There is also an option for Expiry time and Garbage Collection left it as it is because in shared hosting, you cannot refresh this option twice daily or hourly
(however, if you have dedicated servers, then you can select this option as well)
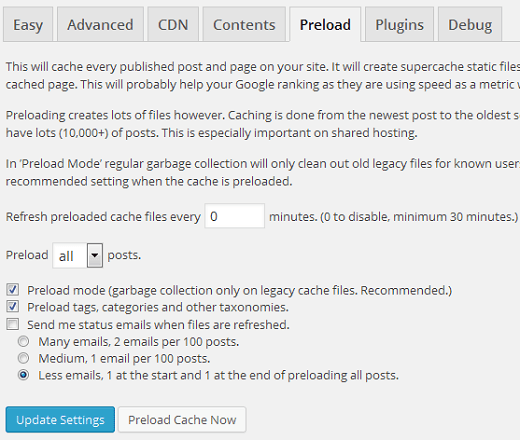
 There are other tabs of CDN, Contents, Preload, Plugins, and Debug. You can optimize CDN options if you have a CDN facility; otherwise, leave them unchanged, and move to the Preload Tab.
Under the Preload Tab, check the first two options and hit update settings.
You have done.
Now your website will take fewer server resources and will load faster. You can check the difference in loading time by visiting tools.pingdom.com or gtmetrix.com
Do share your comments…
Hi Rafaqat,
WP Super Cache is one of most popular and great plugin that help to load WordPress site/blog faster. I personally use this plugin for all of my WP blog. But i miss some settings that i found here.
Thanks for the awesome sharing.
wp super cache is awesome wordpress plugin, the best thing is its user friendly behavior with wordpress theme and other plugins.